Aug 15, 2026
sand valley scorecard, Sand Valley yardage, Sand Valley course guide, golf scorecard reference
Get the official Sand Valley scorecard with tee yardages, par, rating and slope. Download printable PDF and hole-by-hole strategy tips.

You're standing near the first tee, trying to confirm whether the number in your hand is the right yardage, the right tee set, or the rating from an entirely different row. A playing partner is asking where handicap strokes fall, while an event organizer is wondering whether the same information will transfer cleanly into live scoring. The Sand Valley scorecard needs to answer all three questions quickly.
Sand Valley works best as a searchable quick-reference system, not a yardage dump. Use the card to identify the tee, confirm the hole index, compare the front and back nines, and connect each number with a practical target. The result is a calmer pre-round routine for individual players and a more reliable setup for tournaments.
Introduction to the Sand Valley Scorecard Reference
The flagship Sand Valley Course opened in 2017 and was designed by Bill Coore and Ben Crenshaw. Golf Digest's ranking history records its debut in the 100 Greatest Public rankings in 2017, a best placement of 17th, and a position of 21st on the 2025–26 list, details documented in Golf Digest's Sand Valley course profile. That rise helps explain why players often search for the card before they search for a general course review.
Start with the card in a fixed order:
Confirm the course and tee row. Don't assume the longest visible yardage applies to your group.
Read the hole number, par, and handicap index together. These fields tell you what the hole demands and where a handicap stroke may be used.
Check the nine totals. OUT identifies holes 1 through 9, IN identifies holes 10 through 18, and Total combines the complete round.
Match the printed information with the event setup. Tournament staff should verify tee assignments, rating, slope, and hole indexing before distribution.
Use strategy notes beside the number. A yardage only becomes useful when it leads to a club choice, target line, or safe miss.
The primary black-tee layout is listed at 6,938 yards, par 72, with a 73.2 course rating on the published Sand Valley scorecard. The rating, tee options, and hole-index structure make the card useful for casual rounds, handicapped matches, and live scoring workflows.
Printable cards are most useful when the layout is easy to scan under pressure. Digital versions should preserve the same hole order, tee mapping, and scoring fields rather than presenting a disconnected list of distances. That consistency lets a player find a hole in seconds and gives tournament staff one dependable reference before play begins.
Understanding Scorecard Categories and Layout
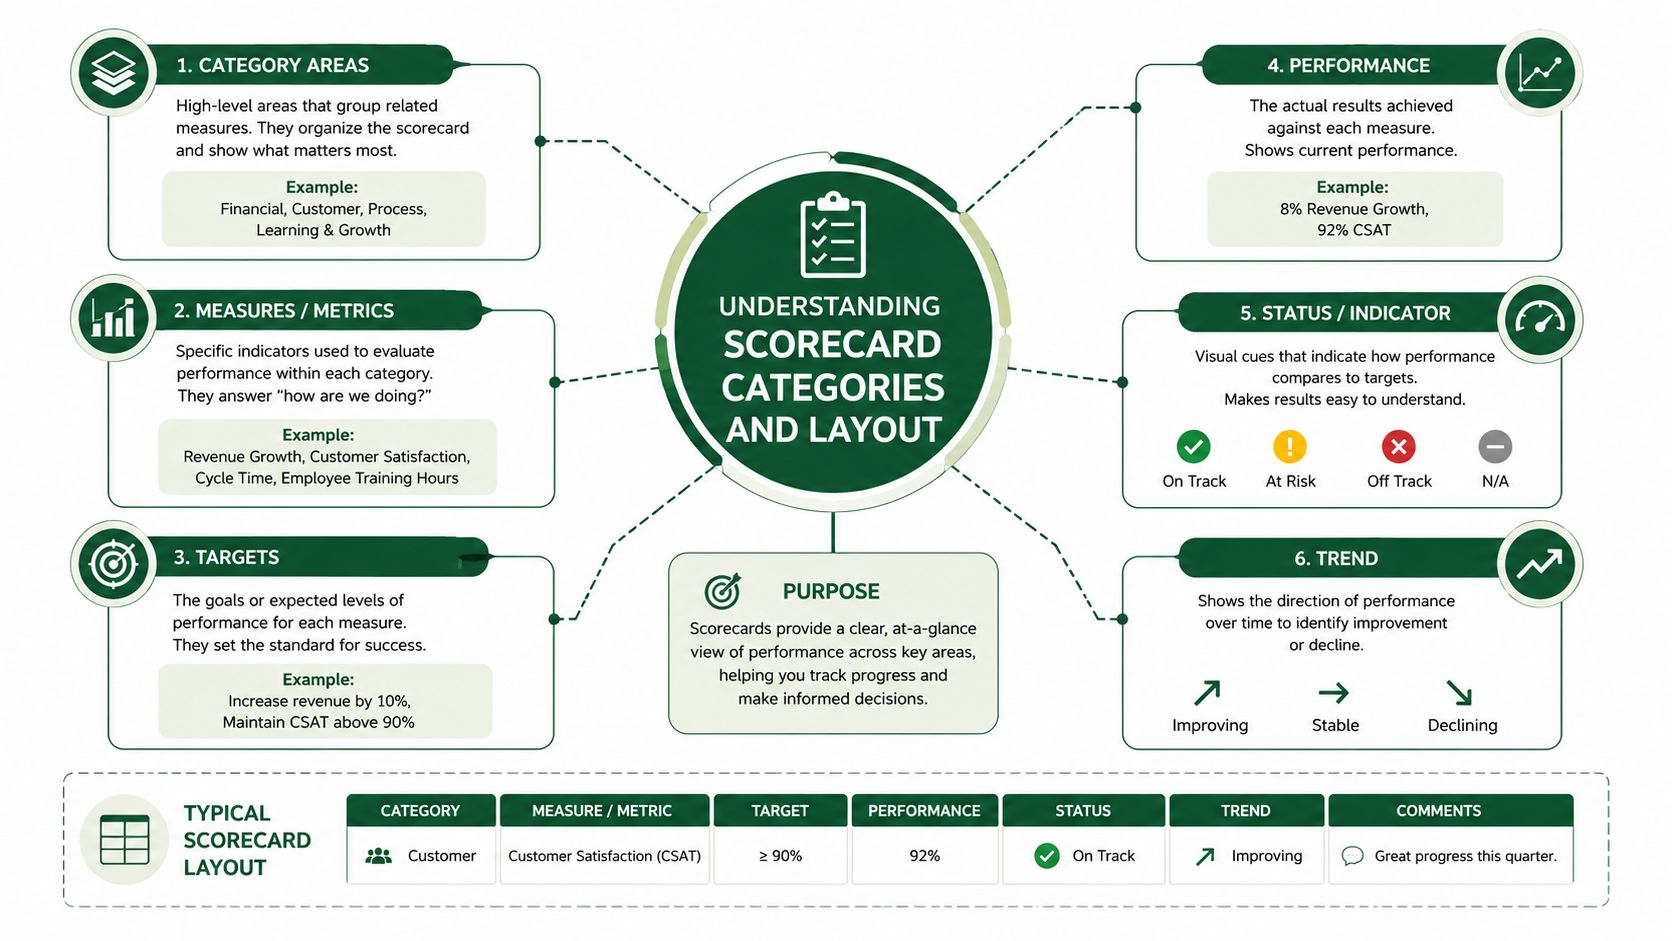
A Sand Valley scorecard works like a searchable quick-reference system, not a loose yardage dump. Its fixed hole index runs from 1 through 18, separates the front nine from the back nine, and provides totals that help players and tournament staff check scoring, par, and the selected tee. The published card uses OUT for holes 1 through 9 and IN for holes 10 through 18, with a final Total column, as shown by BlueGolf's detailed Sand Valley scorecard.
Read across before reading down
Begin by locating the tee row assigned to your group. A hole can display several yardages, so reading the first number you see may send you to the wrong club. Once the row is confirmed, read across the hole and identify:
Hole number, the shared reference for players, officials, and scoring systems.
Par, the expected score for that hole.
Tee-specific yardage, measured from the chosen markers.
Handicap index, which ranks the hole for stroke allocation in a net competition.
Player fields, where names and scores are entered.
OUT, IN, and Total boxes, which support quick addition and score checks.
Use the tee options section for the specific yardages and rating figures tied to each row. A rating or slope belongs to its designated tee set, so copying it to another row can distort event setup and handicap calculations.
Why alignment matters
A well-organized card keeps course information separate from player scoring. Consistent columns, clear spacing, and stable hole order reduce the chance of entering a score in the wrong box when the group is moving quickly. The same structure also helps staff prepare printable cards and configure digital scoring without rebuilding the course hole by hole.
The handicap index ranks difficulty for stroke allocation. It does not predict a player's score. A player receiving strokes applies that ranking, while the gross score remains the actual number of shots taken.
Practical rule: Confirm the tee row, then read the complete hole entry. Use the number with its par, handicap index, and strategy note, never as an isolated yardage.
Tee Options and Total Yardages by Skill Level
Tee selection changes the entire rhythm of a round. It affects approach length, the number of forced carries, the recovery options after an imperfect drive, and whether the group can keep moving without waiting. The Sand Valley scorecard presents a broad range of playable distances, with one published scorecard listing options from 3,550 yards to 6,938 yards (Hole19 course data).
The published back-tee card gives a useful split: 3,214 yards on the front nine and 3,724 yards on the back nine, for a total of 6,938 yards from that tee set (ForeGolf's Sand Valley scorecard). The inward half is therefore the longer planning block, and players should expect the back nine to require more deliberate distance management.
Comparison table
Tee Set | Front 9 Yards | Back 9 Yards | Total Yards |
|---|---|---|---|
Black | 3,214 | 3,724 | 6,938 |
Other published tee sets | Varies by tee | Varies by tee | From 3,550 to 6,938 |
The table uses the published front-nine and back-nine totals for the back-tee layout. The available scorecard data confirms that the remaining tee sets create meaningful segmentation, but it doesn't provide a complete front-nine and back-nine split for every option in the verified material.
Choosing the row
Players who want a championship test can use the longest row, provided they're comfortable with longer approaches and a demanding recovery pattern. A middle tee can be a better choice for a mixed group because it preserves the course's strategic questions without making every long hole a forced carry or extended approach.
Forward tees aren't a concession. They give juniors, seniors, newer players, and resort guests a reasonable way to experience the design while keeping the group together. Tournament directors can also assign different tees by flight, but the setup must carry the correct yardage, rating, slope, and handicap data into the scoring system.
Decision point: Choose the tee that leaves your group with varied clubs into greens, not the tee that looks most impressive on the card.
Course Rating Slope and Handicap Index Explained
Before tee time, treat the scorecard like a small scoring control panel. Course rating, slope, and handicap index describe different parts of the setup, so each number needs its own use.
Course rating estimates the score a scratch player is expected to make under normal conditions. On a par-72 course, Sand Valley's primary scorecard lists a 73.2 rating, meaning that tee set is expected to play above par for a scratch golfer. For the broader definition of the term, tournament staff can review this explanation of course rating.
Slope compares the added difficulty for a bogey golfer with the difficulty faced by a scratch golfer. The U.S. average slope is 113, while the detailed Sand Valley information lists the Cherry tees at 138 slope. It also lists the Cherry tees at 7,138 yards with a 74.5 rating, a figure that conflicts with the published 6,938-yard black-tee total. Do not copy that Cherry row into a printable card or scoring system until the resort or current scorecard confirms the correct tee yardage, rating, and slope. The same source lists the White tees at 5,185 yards with a 64.9 rating and 108 slope, according to Hole19's detailed scorecard information.
Use the numbers as decisions
Course rating helps compare expected scratch difficulty between tee rows. Slope shows how much that challenge changes for higher-handicap players. The hole handicap index then orders where a player receives strokes.
For a net event, the index works like the address labels on the card. A lower index identifies a hole ranked more difficult relative to the others, while a higher index generally indicates where a stroke is allocated later. The player's handicap and the event format determine the calculation. The card supplies the allocation order, not the entire calculation.
A practical tee-and-handicap check
Before publishing a card or starting play, verify four items:
Tee assignment: Each player is attached to the correct tee row.
Rating and slope: Both values match that row.
Hole index: The scoring system follows the same hole order as the printed card.
Format: Net stroke allocation follows the competition rules.
This checklist gives players and tournament staff one searchable reference for tee selection, hole indexing, and scoring. Cross-link each row to the relevant hole strategy notes, and a printable card becomes more useful than a yardage dump. It also prevents a copied tee value from creating a scoring dispute after the round.
Front Nine Hole by Hole Yardages and Strategy
The front nine totals 3,214 yards from the black tees, but the total alone doesn't tell you where shots are lost. Use each hole entry as a decision prompt. Confirm the live tee yardage, identify the handicap index, then choose a target that leaves a manageable next shot.
The verified scorecard data supplied for Sand Valley doesn't include a hole-by-hole yardage, par, or handicap table for holes 1 through 9. It would be misleading to invent those values. The most reliable front-nine method is therefore to use the printed card or current digital card for exact hole entries and pair each number with the following strategy checks.
Holes 1 through 3
Hole 1: Start by identifying the tee yardage and the hole's index before choosing a driver automatically. The opening shot should establish a reliable position, especially if the approach angle changes sharply from one side of the fairway.
Hole 2: Separate carry distance from total distance. If the card shows a hazard, native area, or bunker influencing the landing zone, choose the club that reaches the intended target, not merely the club that produces the longest possible drive.
Hole 3: Treat the first difficult approach as a position exercise. A conservative target near the center of the green often protects the score better than a direct attack at a tucked pin.
Holes 4 through 6
Hole 4: Check whether the safest fairway side improves the next angle. A longer approach from the correct side can be easier than a shorter approach blocked by a bunker or poor lie.
Hole 5: Use the hole handicap index to set expectations. If you receive a stroke here, plan for a two-putt par or controlled bogey rather than forcing a recovery shot after missing the primary target.
Hole 6: Confirm the front-nine running total before teeing off. That total gives tournament staff a quick arithmetic check and helps players notice a score-entry mistake before it carries into the next hole.
Holes 7 through 9
Hole 7: On a long hole, divide the task into landing zones. Select a tee club that leaves a full, comfortable approach rather than chasing a narrow gain in distance.
Hole 8: Pin location can change the preferred side of the green. If the daily flag is near a boundary, bunker, or severe contour, use the wider portion of the putting surface as the target.
Hole 9: Finish the outward half by checking the OUT box against the individual hole scores. A correct subtotal is valuable in both a paper competition and a live scoring workflow.
Front-nine routine: Mark the tee, read the index, choose the landing zone, then confirm the approach number. The card should guide the sequence, not just report the result.
Back Nine Hole by Hole and Strategy
After the turn, use the card as a decision sheet rather than a list of distances. The structured hole index, tee row, and running totals help players choose targets, while tournament staff can use the same entries to check scoring. For the published tee comparisons and overall totals, refer to the table in section 2 instead of repeating those figures here.
Reset at the turn
Start the inward half by confirming the tee selection and handicap index. The back nine may call for a different rhythm, especially if wind, lie, or fatigue has changed. Treat the card like a route map: first identify the hole's demands, then select the landing zone and approach target.
10: Recheck the active tee row before choosing a club. A front-nine decision may no longer fit the new wind or landing zone.
11: Leave room for an imperfect strike. A pin-facing line can create trouble when the recovery side is narrow, so select a target that preserves a manageable next shot.
12: Use the handicap index to set the level of risk. A stroke hole may support a wider target and a two-putt goal, while a lower-index hole can reward an assertive tee position when control is reliable.
Build the middle stretch
13: Break the hole into predictable landing zones. Two controlled shots can produce a better scoring chance than one aggressive swing aimed only at maximum distance.
14: Judge the green from the approach side, not only from the fairway. A pin that appears open may become difficult if the ball finishes below or beyond the preferred putting tier.
15: Read the exact card yardage, then adjust for the day's conditions. Wind across open sandy ground can change the practical club even though the printed distance remains fixed.
Close with a scoring check
Late in the round, simplify the process. Pick the target, commit to the swing, and plan the safest acceptable miss before the shot.
16: Fatigue makes alignment easier to lose. Choose one specific fairway target and stay committed to it through the swing.
17: If the index gives you a stroke, use that information to reduce risk. A safe green-side miss followed by a controlled chip can serve the tournament score better than a narrow flag attack.
18: Enter the final hole score before writing the total. Check that the individual entries agree with the IN subtotal and the complete round total.
The practical order for every inward hole is yardage, lie, wind, target, then miss. That sequence keeps the scorecard useful at the tee, in a tournament office, and during post-round verification.
Pin Placements Local Rules and On Course Notes
The printed yardage doesn't change during the day, but the daily setup can change how that yardage plays. A front pin may invite a direct attack, while a back or side location can make the same club selection too aggressive. Read the flag position, identify the largest safe portion of the green, and select a target that leaves a realistic two-putt opportunity.
Players should also confirm local rules before leaving the first tee. Sandy waste areas, native areas, cart restrictions, preferred lies, and relief procedures can vary by course and daily condition. Don't assume that every sandy surface is treated like a bunker or that every native area permits the same relief.

The pre-round rules check
A tournament committee should state the applicable rules before cards are distributed. Players should then write or mark only information that the committee has approved, including pin references, local-rule notes, or relief instructions. A quick review of how to read pin sheets can help staff and players use hole-location information without confusing it with fixed scorecard yardage.
Use this short checklist:
Confirm the day's holes: Match the pin sheet to holes 1 through 18.
Mark the target: Record a useful flag position or green section, not a vague note.
Check relief: Ask whether the local rule changes the normal procedure.
Protect pace: Choose a target before reaching the ball and avoid repeated indecision.
Record cleanly: Enter each score in the correct hole box immediately.
Course-management note: A difficult pin doesn't require a heroic shot. It requires a clear miss that leaves the next stroke playable.
The card becomes more valuable when it carries both stable information and daily information. Yardage, par, and handicap index remain fixed references, while pin location, wind, and local rules should be updated before play.
Printable Scorecard Download and Live Scoring Setup
A professional scorecard must work in a player's hand, on a scorer's table, and inside the event's digital workflow. Start with the current course information, then confirm that the printed and digital versions use the same tee names, hole order, par, yardages, rating, slope, and handicap index.
Independent tournament design guidance recommends including the course name or logo, holes 1 through 18, par, tee-specific yardages, hole handicap index, player name fields, OUT, IN, and Total scoring boxes, plus course rating and slope. The same golf scorecard design guide identifies common physical formats of 8.5"×3.67" flat or 8.5"×11" folded to 5.5"×8.5", with key data commonly set around 9–11 points for readability.
Build the paper version
Use strict column alignment and generous whitespace. Keep the player name area separate from the fixed course data, and make the tee rows visually distinct so a player can identify the active yardage without hunting across the page.
A folded format can make the card easier to carry, while a flat format may give tournament staff more room for notes. The correct choice depends on how much information the event needs, but neither format should sacrifice hole indexing or score-entry clarity.
Connect it to digital scoring
Before publishing an event, test one complete round from hole 1 through hole 18. Confirm that the digital system recognizes the same par and tee data printed on the card, then verify that OUT, IN, and Total values calculate correctly.
For organizers comparing systems, digital golf scorecards can provide a useful framework for evaluating mobile access, hole navigation, and printed-to-digital consistency. Live Tourney offers web-based tournament management with real-time scoring, customizable scorecards and reports, and player access without requiring an app download.
Related Sand Valley Resort Courses and When to Use Each Card
The resort now needs to be planned as a portfolio, not as one isolated scorecard. Current scorecard pages include Sand Valley, Mammoth Dunes, Sedge Valley, Sandbox, and The Commons, with tee tables and ratings refreshed in 2026, according to current Sand Valley resort course data.
Pull the card for the exact property before assigning pairings. Use Sand Valley or Mammoth Dunes when the group wants a full-scale resort round, Sedge Valley when accuracy and shot-making are central to the plan, and Sandbox or The Commons when the itinerary calls for a shorter or more flexible format. The right sequence depends on the group's abilities, walking preferences, replay goals, and event structure.
Don't use one course's rating, slope, or handicap index for another course. Each daily card should stand alone, with its own tee rows and hole order, so players know which numbers govern that round.
Live Tourney gives golf courses and event organizers web-based tournament setup, real-time leaderboards, customizable reports, and scorecard navigation that players can use on any device without downloading an app. If you're planning a Sand Valley event, visit Live Tourney to see how its scoring and tournament tools can connect the printed card with the live competition.